In the past, we showed you how to use Apple's two-step verification to better secure your iPhone or iPad.
But there's a new game in town and it's called Two-Factor Authentication.
Two-Step vs Two-Factor: What’s the Difference?
The older two-step method (still active by the way) relies on security keys sent via text to a supported iOS device.
It uses this key to allow you to access your account if you cannot verify and also frequently prompts you for codes to maintain secure access.
This new two-factor authentication method works pretty similar but beefs up security.
Security PINs are now 6-digits long compared to 4-digits
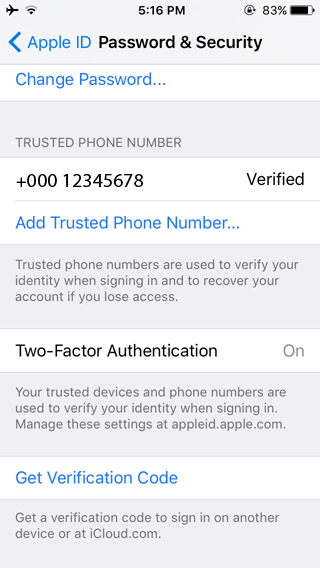
Security PINs for example are now 6-digits long compared to 4-digits with two-step and new trusted device methods also reduce the risk of someone else accessing your account from your lost or stolen phone.
How Does It Work Exactly?
To enable two-factor authentication, you’ll need at least one device running iOS 9 and OS X El Capitan.
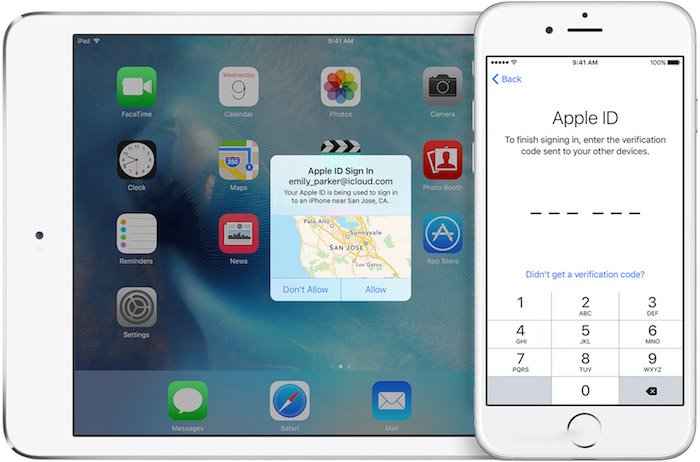
Authentication prompts are sent to each trusted device automatically to avoid the hassle of figuring out where your codes are sent and what to do next.
When the code is sent, a quick map of where the device is located appears to make it easy to verify that the request isn’t coming from a hacker overseas.
Once you have added a device to your trusted devices list using two-factor authentication, you will not be asked to verify again unless you sign out completely, wipe the device or change your main Apple ID password.
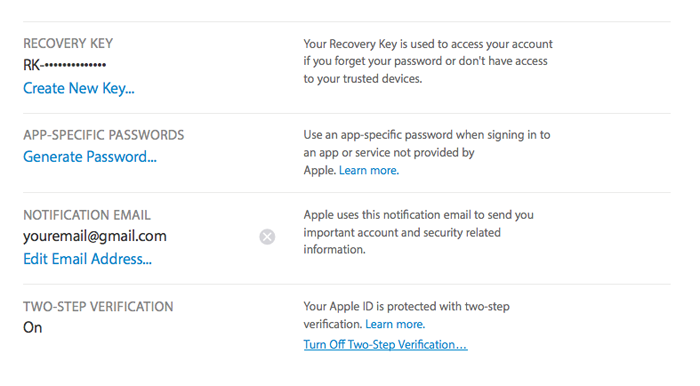
You can also add web browsers to your trusted list to avoid the hassle of verifying every time you sign in on your computer.
Confused? We were also. Let's walk through it.
Setting Up Two-Factor Authentication
If you’re already using Apple’s earlier two-step verification, be sure to disable it before enabling two-factor authentication.Step 1: How-to disable two-step verification (if you already have it)
Instructions
-
1
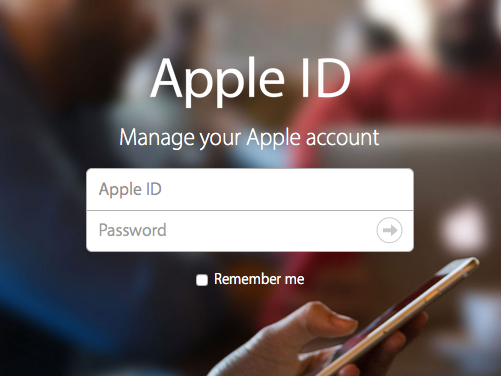
Log in to the Apple ID management page
-
2
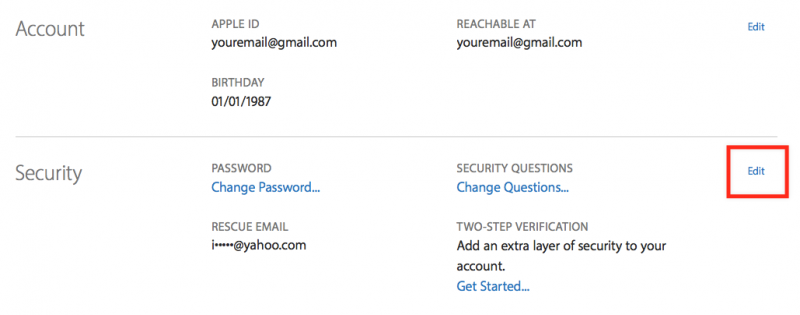
Locate the Security section
-
3
Click Edit
-
4
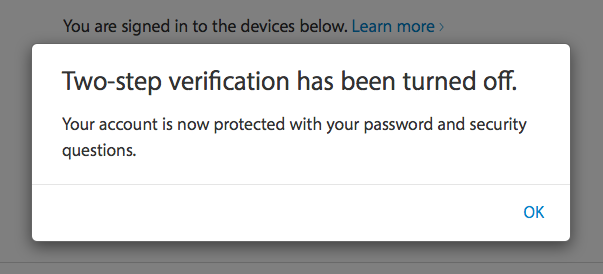
Click Turn Off Two-Step Verification
-
5
Choose new security questions
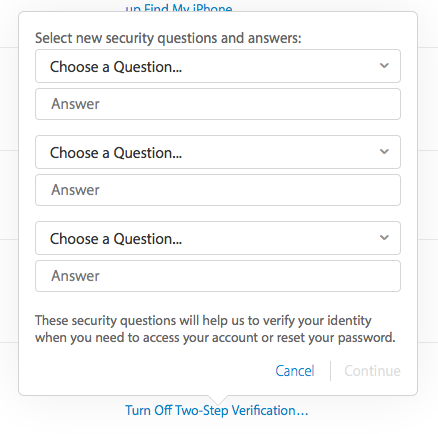
-
6
All done!
Step 2: How-to enable two-factor authentication (on iPhone, iPad, iPod Touch)
Enabling two-factor authentication is easy. The specific steps will depend on the device you’re using. We’ve outlined steps for most common devices below.
Instructions
-
1
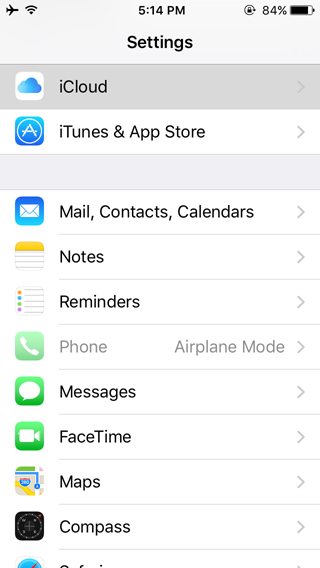
Tap Settings
-
2
Tap iCloud
-
3
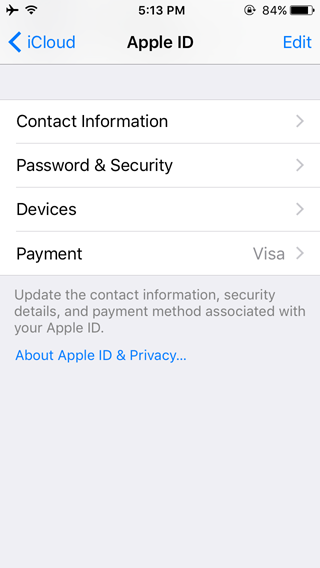
Tap your Apple ID
-
4
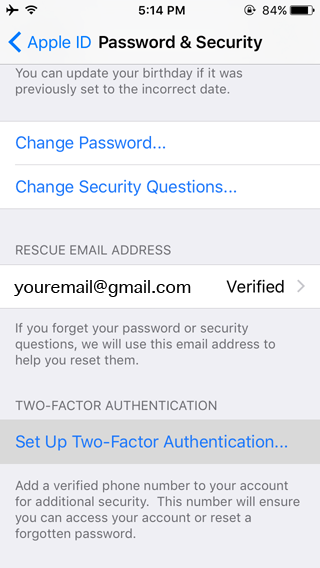
Tap Password & Security
-
5
Tap Turn on Two-Factor Authentication
-
6
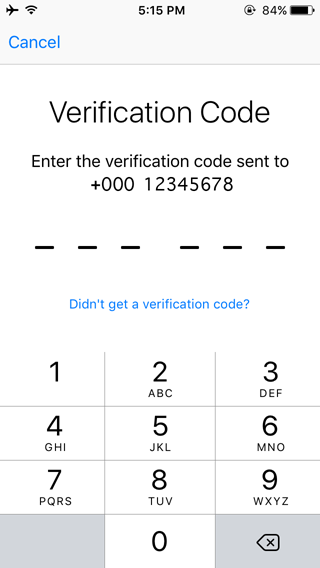
Verify your phone number
-
7
And you have it all set up!
Tips & Warnings
- If you try two-factor authentication and prefer the older method, you will not be able to re-enable two-step verification again for 72 hours after disabling two-factor authentication. During that time, your only account protection will be your password and security questions.
Resources
Conclusion
That’s all there is to it! While we don’t know exactly what Apple has done to improve security behind the scenes with their new release, having longer PINs is sure to improve things and the new authentication and trusted devices systems make it easier than ever to use.